
Solar Light Battery Replacement: Why It’s Necessary and How to Do It
Why Is Battery Replacement Important for Solar Lights?
Solar lights have gained popularity due to their eco-friendly and energy-saving features, making them a popular choice for home, outdoor, and commercial lighting. However, many users notice that over time, the brightness of their lights diminishes or the runtime shortens, which is often due to battery aging. So, how often do the batteries in solar lights need to be replaced? Why is regular replacement necessary? This article will explore the importance of battery replacement cycles and provide a detailed guide on how to replace the battery to maintain optimal performance.

Batteries Have a Limited Lifespan, So Regular Replacement Is Essential
According to a report by GREENSHINE NEW ENERGY titled What is the Best Battery for Solar Street Lights?, commonly used solar light batteries, such as Nickel-Cadmium (NiCd), Nickel-Metal Hydride (NiMH), and Lithium Iron Phosphate (LiFePO4) batteries, all have limited lifespans. For example, a NiMH battery has a cycle life of 500 to 1000 times, meaning it lasts approximately 1.5 to 3 years with daily charge and discharge cycles. The report notes that when the battery capacity drops to less than 70% of its original value, the lighting performance will significantly decrease.
For users, this means that battery aging is inevitable. If ignored, the lights may no longer meet nighttime lighting needs, and may even pose a risk to outdoor safety. Therefore, regularly replacing the battery is a necessary measure to maintain the light’s performance. Users should pay attention to this cycle to avoid the awkward situation of dim lights.
Environmental Factors Accelerate Battery Aging, So Replacement Cycles Should Be Adapted to the Environment
The outdoor environment plays a significant role in the lifespan of batteries. The GREENSHINE report highlights that high temperatures (such as over 35°C in summer) can shorten the lifespan of NiCd and NiMH batteries by 20%-30%, while low temperatures reduce discharge efficiency, leading to shorter operation times. Even the durable LiFePO4 battery is not immune to long-term exposure to extreme conditions.
This means that the replacement cycle is not fixed but should be adapted to local conditions. For example, in hot or cold climates, it is recommended to check the battery condition every 1-2 years. In milder climates, a replacement cycle of 2-3 years may suffice. By observing the battery’s performance (such as dimming or insufficient runtime after charging) and adjusting the replacement plan according to the environment, you can ensure the light remains bright.
Battery Replacement Offers Both Economic and Environmental Benefits
“Why not just replace the entire light?” The answer lies in both cost and environmental impact. The GREENSHINE report shows that the cost of replacing the battery is only 10%-20% of the price of a new light. For example, a NiMH battery may cost $5-10, while a whole solar light could cost up to $50. Additionally, replacing the battery reduces waste, extending the life of the solar light and supporting its green energy mission.
This not only saves money but also promotes an environmentally friendly lifestyle. As long as the correct battery is selected and the replacement is done properly, the light can be restored to like-new condition. The dual benefits of cost savings and environmental responsibility make battery replacement a wise choice.
How to Determine and Replace the Battery in Solar Lights?
After understanding the importance of battery replacement cycles, the next question is how to do it. Below is a step-by-step guide designed to help users resolve this issue and maintain the lights in the best possible condition.
How to Determine If the Battery Needs Replacement
- Observe the Performance: If the light is dimming or turning off too early despite being fully charged during the day, it may be a sign of battery failure.
- Simple Testing Method:
- Prepare a regular non-rechargeable battery (like an AA battery with the same voltage as the original battery, usually 1.2V).
- Place the light in a dark area and replace the original battery with the new one. If the light returns to normal brightness, the original battery is confirmed to be faulty.
- Check the Battery’s Appearance: If the battery shows signs of leakage, swelling, or corrosion, it’s time to replace it immediately.
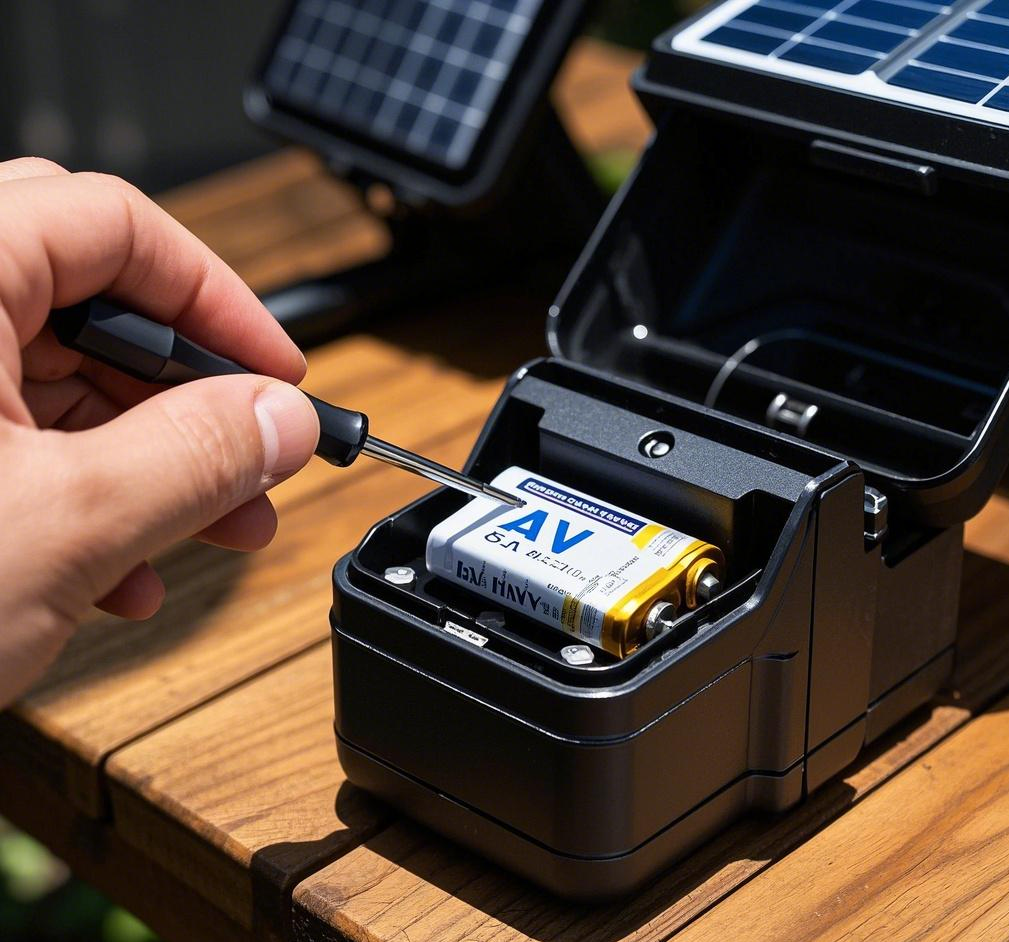
How to Replace the Battery: A Detailed Guide
Tools and Materials Needed:
- New battery: Refer to the light’s manual to confirm the battery type (NiCd, NiMH, or LiFePO4) and specifications (e.g., 1.2V 600mAh). It is recommended to upgrade to NiMH or LiFePO4 for longer life and better performance.
- Small screwdriver: To open the battery compartment.
- Gloves (optional): To avoid direct contact with any potentially corrosive battery materials.
Replacement Steps:
- Turn off the power: Switch off the light (if applicable) to ensure safe handling.
- Open the Battery Compartment: Use the screwdriver to open the battery compartment cover (usually located at the bottom or back of the light), and keep track of the screws.
- Remove the Old Battery: Gently remove the old battery, paying attention to the orientation of the positive and negative terminals (usually marked with “+” and “-“).
- Install the New Battery: Insert the new battery in the correct orientation, ensuring good contact with the terminals.
- Close the Battery Compartment: Replace the compartment cover and secure it with screws, ensuring it is sealed properly to prevent water ingress.
- Test the Light: Place the light in direct sunlight for a few hours to charge the new battery and check whether it works properly at night.
Important Notes:
- Avoid mixing old and new batteries, as this can affect the performance.
- If the battery compartment shows signs of corrosion, clean it with a cotton swab dipped in alcohol before installing the new battery.
- Dispose of old batteries properly through recycling programs—never discard them in the trash.
Daily Maintenance Tips
- Regularly clean the solar panel to ensure it maintains optimal charging efficiency.
- Check the battery condition every 1-2 years to prevent unexpected failures and replace it in time.
Mastering Battery Replacement Cycles and Methods
The typical replacement cycle for solar light batteries is 1.5 to 3 years, depending on the battery type and environmental conditions. The GREENSHINE report confirms that battery aging is the leading cause of solar light failure, and regular replacement not only restores lighting performance but also offers economic and environmental benefits. By following the detailed steps above, you can easily check the battery condition and replace it to keep your lights shining bright.


-5-450x231.jpg)


Leave a Reply