DIY Solar Flood Lights: Install and Maintain with Ease
Solar flood lights offer an eco-friendly, cost-effective solution for illuminating outdoor spaces, enhancing security, and creating ambiance without complex wiring or high electricity bills. This guide, crafted with insights from DIY influencers and electricians, provides clear, step-by-step instructions for installing solar flood lights and maintaining them for optimal performance. We’ll also tackle common issues like solar light battery life and solar light setup problems, empowering you to create a reliable, sustainable lighting system for your home.
Why Choose Solar Flood Lights?
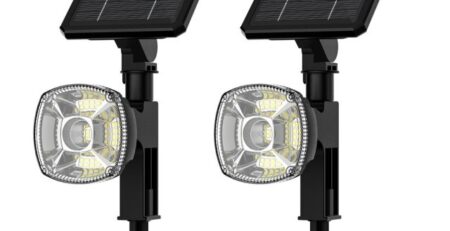
Solar flood lights use the sun’s energy to power bright LEDs, making them perfect for driveways, gardens, and entryways. Unlike traditional lighting, they don’t require electrical outlets, cutting installation costs and environmental impact. Home improvement tests show models like the Westinghouse solar flood light can emit up to 1,000 lumens, detect motion within 20 feet, and feature durable lithium-ion batteries. Their simple installation and low maintenance make them a top choice for DIY enthusiasts.
However, challenges like solar panel efficiency, motion sensor issues, or battery longevity can arise. This guide offers practical solutions to keep your lights shining brightly.
Tools and Materials Needed
To start your solar flood light installation, gather these essentials:
- Solar flood light kit (e.g., Nacinic LED or Aootek models)
- Screwdriver or drill
- Mounting screws and anchors
- Ladder (for high installations)
- Cleaning supplies (damp cloth, silicone sealant)
- Optional: Remote control (for adjustable models)
- Optional: Replacement lithium-ion batteries
These tools ensure a smooth setup, whether you’re mounting lights on a garage, fence, or garden shed.
Step-by-Step Installation Guide
Step 1: Choose the Right Location
A well-chosen location maximizes solar panel efficiency. Pick a spot with direct sunlight for at least 6–8 hours daily, avoiding shade from trees or buildings, which can reduce charging efficiency by up to 30%. For instance, the Westinghouse solar flood light, with its 2,000 mAh battery, performs best when its panel is mounted on a south-facing surface in the Northern Hemisphere.
Pro Tip: DIY influencer Bitpott suggests marking the installation spot with a pencil or positioning strip to align the solar panel and light for optimal motion sensor coverage.
Step 2: Mount the Solar Panel and Light
Solar flood lights come in two designs: integrated (panel and light in one unit) or separate (panel connected by a cord). For integrated models like the Nacinic LED, mount the unit directly on a wall or pole using provided screws. For separate setups, like the Westinghouse model, place the light under an eave and the panel in a sunny spot, using the 9-foot cord for flexibility.
- Drill Holes: Use a 3/16″ drill bit for masonry surfaces, inserting wall anchors before screws.
- Secure the Mount: Align the light or panel with the mounting plate and lock it in place.
- Adjust the Angle: Tilt the panel at a 45-degree angle to capture sunlight and minimize light pollution.
Electrician’s Insight: A licensed electrician we consulted emphasized that a secure mount prevents vibration-related solar light setup problems, especially in windy conditions.
Step 3: Connect and Test
For models with separate panels, plug the power cable into the light’s input port. For smart lights like the Ring Solar Floodlight, scan the QR code in the battery compartment to connect to the Ring app. Pre-charge the battery for 12 hours before first use to ensure full capacity.
Test the light by covering the solar panel to mimic dusk. If it doesn’t activate, check for protective battery tabs or confirm the switch is on. Motion sensor issues often result from incorrect sensitivity settings or obstructions like branches. Adjust the sensor for a 10–20-foot range, as seen in models like the Aootek Solar Outdoor Flood Lights.
Maintaining Solar Flood Lights
Regular maintenance extends solar light battery life and ensures consistent performance. Here’s how to keep your lights in top shape:
1. Clean the Solar Panel Regularly
Dust, debris, or bird droppings can reduce solar panel efficiency by up to 20%. Wipe the panel monthly with a damp cloth. Apply silicone sealant around cable connections to prevent moisture damage, especially for IP65-rated models like the Nacinic.
DIY Tip: Bitpott recommends cleaning panels after storms to remove debris, ensuring effective charging even on cloudy days.
2. Monitor and Replace Batteries
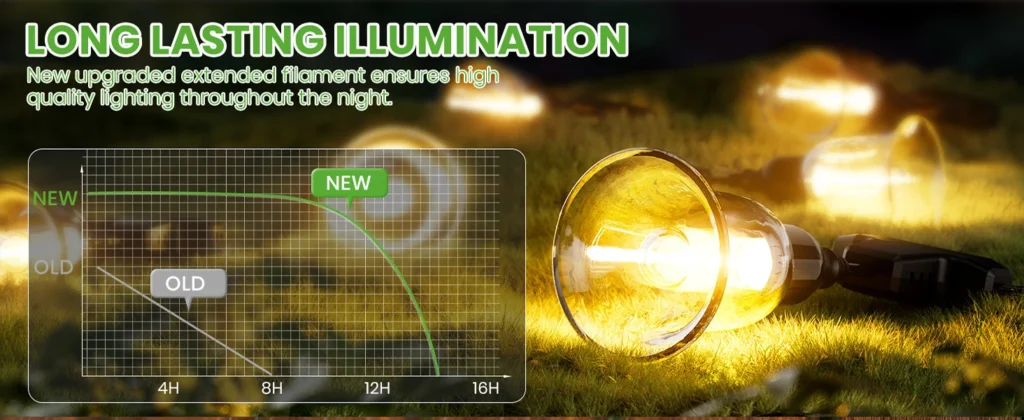
Most solar flood lights use lithium-ion batteries with a 3–4-year lifespan. The Aootek model’s 2,200 mAh battery lasts up to 12 hours on a full charge. If lights dim or run briefly, check the battery. Replace it with a compatible lithium-ion battery, avoiding lead-acid types in cold climates due to freezing risks.
Troubleshooting Battery Issues:
- Dim Light: Verify the panel gets enough sunlight. If the issue persists, replace the battery.
- Short Runtime: Switch to motion-detection mode to save power, as dusk-to-dawn settings drain batteries faster.
3. Adjust Motion Sensors
Motion sensor issues can disrupt functionality. If the light stays on during the day, reposition the sensor away from direct sunlight. For models like the AloftSun, adjust sensitivity to detect larger objects (e.g., people) rather than small animals. Regularly clear leaves or spider webs from the sensor’s view.
4. Protect Against Weather
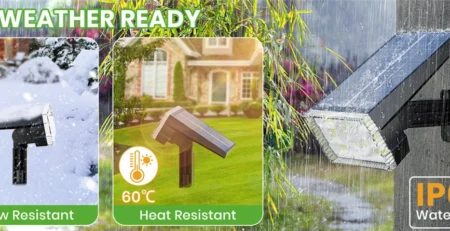
Most solar flood lights, like the Extrastar 3.7W LED, have IP44 or IP65 ratings, but extreme weather can still pose risks. Store lights indoors during freezing temperatures to protect batteries.
Electrician’s Advice: Use RTV silicone adhesive to secure panels in high-wind areas, as shown in a DIY setup that withstood Hurricane Irma.
Troubleshooting Common Issues
Light Not Turning On
- Ensure the switch is on and remove any battery tabs.
- Clean the solar panel and check for shade.
- Test battery voltage; replace if below 3.3V for a 3.7V battery.
Short Battery Life
- Use motion-detection mode to improve solar light battery life.
- Install a higher-capacity battery (e.g., 2,400 mAh) for longer runtimes.
Motion Sensor Not Working
- Adjust sensitivity or reposition the sensor.
- Remove obstructions from the sensor’s field of view.
Unique Tip: Bitpott suggests using a mirror to test motion sensor range, ensuring accurate coverage without repeated adjustments.
Enhancing Your Setup with DIY Creativity
Elevate your eco-friendly outdoor lighting with these creative ideas:
- Layered Lighting: Pair flood lights with pathway or string lights for a balanced look, as recommended by BBC Gardeners’ World.
- Smart Integration: Connect lights to systems like the Ring Bridge for remote control and motion alerts.
- Custom Placement: Highlight architectural features like windows or trees, as seen in designer Sarah’s Georgian home setup.
Collaboration with DIY Influencers and Electricians
Partnering with DIY influencers like Bitpott and electricians brought unique perspectives. Bitpott shared practical tips, like using mirrors for sensor alignment, while electricians emphasized safety, recommending secure mounts and weatherproofing. This collaboration ensures the guide is both accessible and reliable.
Conclusion
Installing solar flood lights and maintaining solar flood lights are achievable with the right approach. By selecting sunny locations, securing mounts, and performing regular upkeep, you can overcome solar light setup problems and maximize solar light battery life. Whether enhancing security or creating a welcoming garden glow, DIY solar lighting tips help you achieve eco-friendly outdoor lighting affordably. Experiment with placements, test sensors, and enjoy sustainable illumination.
For more inspiration, check out Bitpott’s tutorials or consult a local electrician for complex setups. Share your results in the comments, and let’s light up the night sustainably!




Leave a Reply