How to clean solar post caps
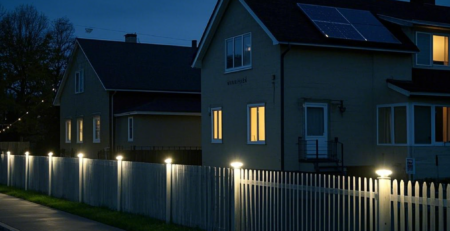
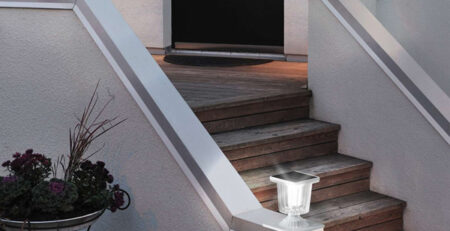
Solar post cap lights have become an increasingly popular choice for homeowners looking to enhance their outdoor spaces with eco-friendly illumination. These versatile fixtures, including the elegant imperial solar post cap light, not only provide ambient lighting but also add a touch of sophistication to fences, decks, and patios. However, to ensure these solar-powered marvels continue to shine brightly night after night, proper maintenance and cleaning are essential. In this comprehensive guide, we’ll learn the best practices for keeping your solar post caps in pristine condition, maximizing their efficiency, and extending their lifespan.
Grasping the Importance of Clean Solar Post Caps
Before diving into the cleaning process, it’s crucial to understand why maintaining clean solar post caps is so important. Solar post cap lights rely on photovoltaic cells to convert sunlight into electricity, which is then stored in batteries to power the LED lights at night. When these solar panels become dirty or obstructed, their ability to absorb sunlight diminishes, leading to reduced performance and shorter illumination times.
Dust, pollen, bird droppings, and other environmental debris can accumulate on the surface of solar panels, creating a barrier that blocks sunlight. This accumulation not only affects the light’s performance but can also lead to long-term damage if left unattended. Regular cleaning helps to maintain optimal energy conversion, ensures brighter and longer-lasting illumination, and protects your investment in these eco-friendly lighting solutions.
Moreover, clean solar post caps contribute to the overall aesthetic appeal of your outdoor space. Whether you’ve installed standard solar post cap lights or the more ornate imperial solar post cap light, keeping them clean enhances their appearance and preserves the ambiance they create in your garden, patio, or deck area.

Essential Cleaning Tools and Materials
To effectively clean your imperial solar post cap lights, you’ll need to gather a few basic supplies. Here’s a list of recommended tools and materials:
- Soft-bristled brush or microfiber cloth
- Mild, non-abrasive soap or specialized solar panel cleaner
- Warm water
- Spray bottle
- Soft sponge
- Distilled water (for final rinse)
- Rubber gloves
- Step ladder (if needed for hard-to-reach caps)
It’s important to note that harsh chemicals, abrasive materials, or high-pressure water should be avoided, as these can damage the delicate components of your solar post cap lights. The goal is to clean gently yet effectively, preserving both the functionality and appearance of your lighting fixtures.
Step-by-Step Cleaning Process
Now that you have your cleaning supplies ready, let’s walk through the process of cleaning your solar post cap lights:
- Safety First: Ensure you’re working on a dry, sunny day to avoid electrical hazards and to allow the caps to dry quickly after cleaning.
- Initial Inspection: Examine each solar post cap light for any visible damage or loose parts. Address any issues before cleaning to prevent water ingress.
- Dust Removal: Use a soft-bristled brush or microfiber cloth to gently remove loose dust and debris from the solar panel and light fixture.
- Prepare Cleaning Solution: Mix a small amount of mild soap with warm water in a spray bottle. For stubborn stains, you may use a specialized solar panel cleaner.
- Apply Cleaning Solution: Lightly spray the cleaning solution onto the solar panel and other surfaces of the post cap light. Avoid saturating the fixture, especially around seams or electrical components.
- Gentle Scrubbing: Using a soft sponge or microfiber cloth, gently clean the surfaces in a circular motion. Pay extra attention to the solar panel, ensuring all dirt and grime are removed.
- Rinse Thoroughly: Use clean, distilled water to rinse away all soap residue. Distilled water helps prevent mineral deposits that can leave spots on the solar panel.
- Dry Carefully: Use a clean, lint-free cloth to dry the solar post cap light, paying particular attention to the solar panel to avoid water spots.
- Polish (Optional): For imperial solar post cap lights or other decorative models, you may want to use a specialized metal or plastic polish to restore shine to non-solar panel areas.
- Final Check: Once dry, inspect the solar post cap light to ensure all dirt has been removed and no water remains in any crevices.
Maintenance Tips for Longevity
While regular cleaning is crucial, there are additional steps you can take to ensure the longevity and optimal performance of your solar post cap lights:
- Seasonal Checks: Perform a thorough inspection and cleaning at the beginning of each season, paying extra attention before winter and after spring to remove accumulated debris.
- Positioning: Ensure your solar post cap lights, especially the solar panels, are positioned to receive maximum sunlight throughout the day. Trim any overhanging branches or vegetation that may cast shadows.
- Battery Care: Most solar post cap lights use rechargeable batteries. Check and replace these batteries according to the manufacturer’s recommendations to maintain optimal performance.
- Weather Protection: During severe weather conditions, consider covering your solar post cap lights or removing them if possible to protect them from damage.
Troubleshooting Common Issues
Even with regular cleaning and maintenance, you may occasionally encounter issues with your solar post cap lights. Here are some common problems and their potential solutions:
- Dim or No Light: If your solar post cap lights are not shining as brightly as usual or not lighting up at all, first ensure the solar panel is clean and unobstructed. Check that the light is set to “ON” and that the battery is properly connected. If the issue persists, the battery may need replacement.
- Short Illumination Time: If your lights are not staying illuminated for as long as they used to, this could be due to a dirty solar panel, an aging battery, or reduced sunlight exposure. Clean the panel, check for obstructions, and consider replacing the battery if it’s old.
- Water Ingress: If you notice moisture inside the light fixture, carefully dry it out and check the seals. Replace any damaged seals and ensure the cap is properly closed to prevent future water damage.
- Flickering Lights: This could be caused by a loose connection or a failing LED. Check all connections and consult the manufacturer’s guide for LED replacement instructions if necessary.
- Discoloration: UV exposure can cause some plastics to yellow over time. While this is largely cosmetic, you can sometimes improve appearance with plastic restorer products designed for outdoor use.
Conclusion
Maintaining clean and well-functioning solar post cap lights is key to enjoying beautiful, eco-friendly outdoor lighting for years to come. By following these cleaning and maintenance guidelines, you can ensure your solar post caps, including elegant options like the imperial solar post cap light, continue to shine brightly and efficiently.
If you’re looking to upgrade your outdoor lighting with high-quality solar post cap lights or need expert advice on maintaining your current fixtures, don’t hesitate to reach out to us at info@forigat.com. Our team at BITPOTT is committed to providing top-notch solar lighting solutions and ensuring our customers get the most out of their eco-friendly lighting investments.
References
- U.S. Department of Energy. (2021). “Solar Photovoltaic Technology Basics.” Office of Energy Efficiency & Renewable Energy.
- National Renewable Energy Laboratory. (2022). “Best Practices in Photovoltaic System Operations and Maintenance.”
- Solar Energy Industries Association. (2023). “Solar Technology: Photovoltaics.”
- American Lighting Association. (2022). “Care and Maintenance of Outdoor Lighting Fixtures.”
- Environmental Protection Agency. (2023). “Energy Star Program: Outdoor Solar Lighting.”


-1-2-450x231.webp)


Leave a Reply