
Ultimate Guide to Replacing Batteries in Solar Lights
Solar lights are a sustainable and budget-friendly solution for illuminating gardens, walkways, and outdoor areas. These lights depend on rechargeable batteries to store solar energy and provide light after sunset. Over time, batteries lose capacity, resulting in dimmer output or failure to function. Regularly replacing and maintaining these batteries is essential for optimal solar light performance. This guide provides a detailed roadmap to replace solar light batteries, select suitable replacements, and maintain your lights for long-lasting efficiency, ensuring your solar lighting system remains reliable and eco-friendly.
Battery Types Used in Solar Lights
Understanding the types of batteries in solar lights is critical for effective replacement. The most common types include:
- Nickel-Metal Hydride (NiMH) Batteries: Widely used for their environmental friendliness and higher capacity, NiMH batteries have a nominal voltage of 1.2V and capacities ranging from 600mAh to 2900mAh. They exhibit minimal memory effect, meaning they don’t lose capacity if not fully discharged before recharging. However, their higher self-discharge rate (about 1% daily) makes them less ideal for lights used sporadically.
- Nickel-Cadmium (NiCd) Batteries: Once prevalent, NiCd batteries are now less common due to their environmental impact from toxic cadmium. They suffer from a pronounced memory effect, reducing capacity if not fully discharged before recharging. With a 1.2V voltage, their capacity typically ranges from 450mAh to 1100mAh. Since 2005, European regulations have limited their use, but older solar lights may still contain them.
- Lithium-Ion (Li-ion) Batteries: Gaining popularity in modern solar lights, Li-ion batteries offer high energy density, longer lifespan (up to several years), and no memory effect. Operating at 3.7V, they have capacities from 1000mAh to 3000mAh. Their lower self-discharge rate and ability to function in extreme temperatures make them ideal for outdoor use, though they come at a higher cost.
Identifying your solar light battery type (check the battery label or manual) is crucial before selecting a replacement.
Choosing the Right Replacement Battery
Selecting the correct replacement battery ensures compatibility and performance. Here’s how to choose:
- Battery Capacity (mAh): The milliamp-hour (mAh) rating indicates energy storage. For instance, a 2000mAh NiMH battery provides longer illumination than a 600mAh one. Match or slightly exceed the original capacity to avoid straining the solar panel’s charging circuit.
- Voltage Compatibility: Ensure the replacement battery’s voltage aligns with the original (1.2V for NiMH/NiCd, 3.7V for Li-ion). Mismatched voltage can damage the solar light circuit or reduce performance.
- Battery Size and Type: Solar lights typically use standard sizes like AA or AAA for NiMH/NiCd or specific cylindrical sizes (e.g., 18650) for Li-ion. Confirm the physical size and terminal type for a proper fit.
- Brand Reliability: Choose trusted brands like Panasonic Eneloop, Energizer, or Anker for durable batteries and consistent performance. Avoid generic batteries, which may exaggerate capacity or have shorter lifespans.
- Environmental Considerations: Opt for NiMH or Li-ion for eco-friendly solar lights, as NiCd batteries require special disposal due to toxicity. Look for recyclable options to reduce environmental impact.
For example, if your solar light uses a 1.2V 800mAh NiMH AA battery, a 1.2V 1000mAh NiMH AA from a reputable brand is a safe upgrade. Always check the solar light manual or battery compartment label for specifications.
Step-by-Step Guide to Replacing Solar Light Batteries
Replacing batteries in solar lights is straightforward with the right tools and precautions. Follow these steps:
- Turn Off the Solar Light: If your light has an on/off switch, turn it off to prevent electrical issues. Disconnect the solar panel if feasible.
- Locate the Battery Compartment: Most solar lights have a battery compartment on the back or bottom, secured by screws or a sliding cover. Consult the user manual for access details.
- Remove the Old Battery: Use a small screwdriver (e.g., bitpott) to open the compartment. Gently remove the old battery, noting its orientation (positive/negative terminals). If corroded, wear gloves and dispose of it properly.
- Check Compatibility: Ensure the replacement battery matches the original in type, voltage, and size. Verify the mAh rating is within the solar light’s charging capacity.
- Install the New Battery: Insert the new battery, aligning the positive (+) and negative (-) terminals as marked. Ensure a secure fit to prevent loose connections.
- Secure the Compartment: Close the cover and tighten screws. Confirm the compartment is waterproof to protect against outdoor elements.
- Test the Light: Place the solar light in sunlight to charge for 6–8 hours. Test it at night to ensure proper function. If it fails, check connections or consult a technician.
Tip: Photograph the battery and compartment before removal to reference terminal orientation and model details.
Maintenance Tips for Solar Lights and Batteries
Proper maintenance extends the life of solar lights and their batteries. Consider these tips:
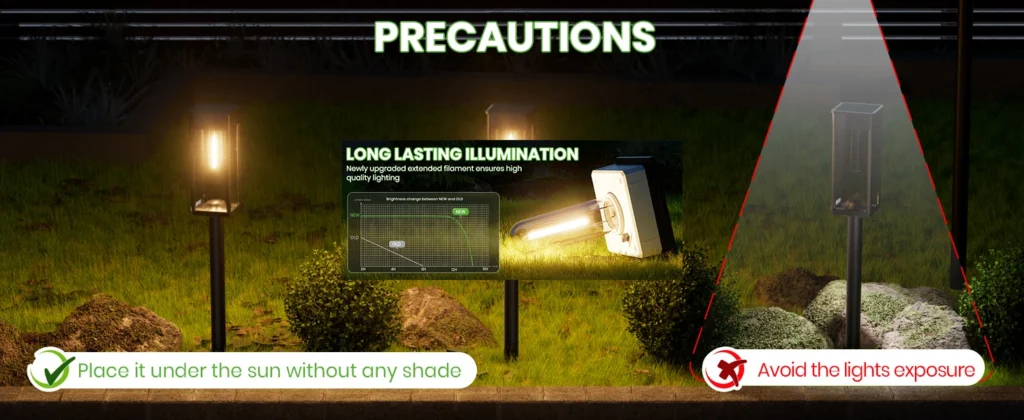
- Clean the Solar Panel: Dust or debris on the solar panel reduces charging efficiency. Wipe it monthly with a damp cloth to maximize sunlight absorption.
- Avoid Over-Discharging: Prevent batteries from draining completely, as this can harm NiMH and Li-ion batteries. Charge them regularly, especially during cloudy periods.
- Store Properly: When storing solar lights in winter, remove batteries and store them in a cool, dry place at 40–50% charge to minimize self-discharge.
- Regular Inspections: Check for corrosion or loose connections in the battery compartment every 6 months. Replace damaged parts promptly.
- Cycle Batteries: For NiMH batteries, perform a full charge-discharge cycle every few months to maintain capacity and reduce memory effect.
These practices keep your solar lighting system efficient and reliable.
Common Mistakes to Avoid When Replacing Batteries
Avoid these errors for a successful battery replacement:
- Using Mismatched Batteries: Installing a battery with incorrect voltage or type (e.g., NiCd instead of NiMH) can damage the solar light or impair performance. Always match specifications.
- Ignoring Polarity: Incorrectly aligning terminals can short-circuit the light. Verify orientation before closing the compartment.
- Overlooking Capacity Limits: Using a battery with significantly higher mAh than the original may overload the solar panel, causing incomplete charging. Stick to similar or slightly higher capacities.
- Neglecting Waterproofing: Failing to seal the battery compartment can allow water ingress, damaging the solar light circuit. Ensure seals are intact.
- Improper Disposal: Discarding NiCd or Li-ion batteries in regular trash harms the environment. Use recycling centers for safe disposal.
Avoiding these mistakes maximizes the lifespan and efficiency of your solar lights.
Frequently Asked Questions (FAQs)
Here are answers to common questions about solar light battery replacement:
- Can I use any rechargeable battery in my solar light?
No, you must use a battery matching the original type, voltage, and size. For example, a 1.2V NiMH AA cannot be replaced with a 3.7V Li-ion or non-rechargeable alkaline battery, as this could damage the light. - How often should I replace solar light batteries?
NiMH batteries typically last 1–2 years, while Li-ion can last 3–5 years, depending on usage and maintenance. Replace them when you notice dimming or inconsistent performance. - Can I mix old and new batteries?
Mixing batteries with different capacities or ages can cause uneven charging and reduced performance. Replace all batteries in a set simultaneously. - Why isn’t my solar light working after battery replacement?
Check for incorrect installation, loose connections, or a dirty solar panel. Ensure the battery is charged and compatible. If issues persist, the solar light circuit may need repair. - Are NiMH batteries better than Li-ion for solar lights?
It depends. NiMH batteries are cheaper and widely compatible but have a higher self-discharge rate. Li-ion batteries offer longer life and better efficiency but cost more.
Replacing batteries in solar lights is a simple yet essential task to maintain energy efficiency and brightness. By understanding battery types, choosing the right replacement battery, following proper installation steps, and adopting regular maintenance practices, you can ensure your solar lighting system performs optimally. Avoiding common mistakes and addressing FAQs empowers you to make informed decisions, enhancing the longevity and environmental benefits of your solar lights. With this guide, you’re equipped to keep your outdoor spaces brilliantly lit, sustainably and cost-effectively.


-3-450x231.webp)


Leave a Reply