
Smart Solar Lighting and Irrigation: A Beginner’s Guide
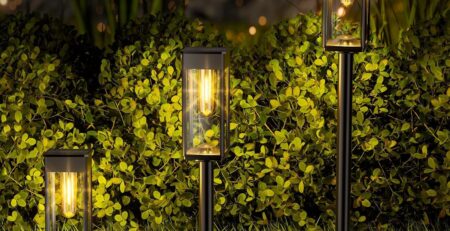
It’s midnight, your sprinkler system starts, and you’re fumbling in the dark to check a water pipe, only to step on it and cause a mess. Or perhaps you’ve left your outdoor lights on after irrigation, wasting energy all night. These are common frustrations for homeowners who love their gardens but struggle to manage irrigation and lighting efficiently. As a smart home enthusiast, I’m here to guide you through linking WiFi-enabled solar lights with smart irrigation systems like Rain Bird or Orbit. This setup lets your lights turn on automatically when irrigation starts, helping you see pipes and plants clearly, and then shut off after watering to save energy. Best of all, it’s beginner-friendly—no manual switches, no tech expertise needed. Let’s dive into how you can create a seamless, energy-saving solar lighting and irrigation system for your yard.
-1-1024x400.webp)
Why Link Solar Lights with Your Irrigation System?
Manually turning on lights during irrigation or forgetting to turn them off afterward is a hassle. For garden lovers, a smart setup where lights respond to your irrigation schedule—called solar lighting and irrigation linkage—solves these pain points. This integration ensures your yard is lit up exactly when you need it, like during late-night watering, so you can check for leaks or monitor plants without fumbling in the dark. Plus, it’s eco-friendly: solar lights use renewable energy, and linking them to irrigation prevents lights from staying on unnecessarily, saving battery life. Brands like Rain Bird and Orbit make this possible with WiFi-enabled systems, perfect for homes looking to simplify yard care.
Choosing the Right Equipment for Solar Lighting and Irrigation Linkage
To create a light-controlled irrigation system, you’ll need compatible devices that work together via WiFi. Here’s what to look for:
- WiFi-Enabled Solar Lights: Choose solar lights with smart features, such as wall-mounted or pathway lights compatible with apps like Amazon Alexa, Google Home, or dedicated lighting apps (e.g., Philips Hue or LIFX). Look for models with adjustable brightness (100–400 lumens for pathways, 500+ for larger areas) and weatherproof ratings (IP65 or higher) to handle North American climates, from rainy Seattle to snowy Buffalo.
- Smart Irrigation Controller: Systems like Rain Bird’s ARC8 or Orbit’s B-hyve are excellent choices. These WiFi-enabled controllers let you manage watering schedules via a mobile app and integrate with smart home platforms. Ensure the controller supports 6–8 zones for typical home gardens and is EPA WaterSense certified for efficiency.
- Smart Home Hub (Optional): A hub like Amazon Echo or Google Nest can simplify integration by connecting lights and irrigation systems through a single app or voice commands, making setup easier for beginners.
- Stable WiFi Network: Both lights and the irrigation controller need to be on the same 2.4 GHz WiFi network for reliable communication. A strong signal in your yard is key—consider a WiFi extender if coverage is spotty.
Setting Up the Linkage: A Step-by-Step Guide
Here’s how to connect your solar lights and irrigation system to work together seamlessly. Don’t worry if you’re new to smart home tech—this process is designed to be straightforward.
Step 1: Install Your Solar Lights
- Choose Strategic Locations: Place solar lights along pathways, near water pipes, or around plants you want to monitor during irrigation. Ensure they get at least 6 hours of direct sunlight daily for optimal charging.
- Mount Securely: Use stakes for pathway lights or wall mounts for wall lights, ensuring they’re stable and won’t tip over in wind or rain.
- Connect to WiFi: Download the light’s app (e.g., LIFX or Philips Hue) and follow the instructions to connect to your 2.4 GHz WiFi network. Test the app to confirm you can turn lights on/off and adjust brightness.
Step 2: Set Up Your Irrigation Controller
- Install the Controller: Mount your Rain Bird or Orbit controller indoors or in a weatherproof outdoor enclosure. Connect it to your sprinkler system’s zone wires as per the manual.
- Link to WiFi: Download the controller’s app (e.g., Rain Bird 2.0 or Orbit B-hyve) and connect the controller to your WiFi network. Test watering schedules to ensure the system responds correctly.
- Set Watering Schedules: Program your irrigation to run at desired times, such as early morning or late evening, with durations suited to your plants (e.g., 10–20 minutes per zone).
Step 3: Create the Linkage Logic
To make your lights turn on before irrigation, stay on during watering, and turn off afterward, you’ll use a smart home app or irrigation-specific app like Irrigation Caddy. Here’s a simple setup:
- Use a Compatible App: Apps like Irrigation Caddy, IFTTT, or smart home platforms (Alexa, Google Home) allow you to create “if-then” rules. For example, “If irrigation starts, then turn on lights.”
- Set the Timing: Configure lights to turn on 5 minutes before irrigation at 70% brightness (to save energy while providing clear visibility). Keep lights on during watering, then turn them off 10 minutes after irrigation ends to allow time for inspection.
- Example Rule in Irrigation Caddy or IFTTT:
- Trigger: Irrigation controller (e.g., Rain Bird ARC8) starts a watering cycle.
- Action: Turn on specified solar lights (e.g., LIFX pathway lights) at 70% brightness.
- Duration: Keep lights on until 10 minutes after the watering cycle ends.
- Test the Setup: Run a manual irrigation cycle to confirm lights turn on/off as programmed. Adjust timing or brightness if needed.
Step 4: Add Weather-Based Rules
To protect your solar lights and save energy, set rules to disable the linkage during rain:
- Rain Delay Feature: Most smart irrigation controllers, like Rain Bird’s, have a rain delay option that pauses watering during wet weather. Link this to your lights so they don’t turn on unnecessarily.
- Weather App Integration: Use apps like Rain Bird 2.0 or Orbit B-hyve to pull local weather data and automatically skip lighting during rain or high humidity to prevent water damage to electronics.
Linkage Steps Summary Table
| Step | Action | Tool/App | Notes |
|---|---|---|---|
| Install Solar Lights | Place in sunny spots, connect to WiFi | Lighting app (e.g., LIFX, Hue) | Ensure IP65+ rating for weather resistance |
| Set Up Irrigation Controller | Mount, wire to zones, connect to WiFi | Rain Bird 2.0, Orbit B-hyve | Test watering schedules first |
| Create Linkage Logic | Set lights to turn on 5 min before, off 10 min after irrigation | Irrigation Caddy, IFTTT, Alexa | Use 70% brightness for energy efficiency |
| Add Weather Rules | Disable linkage during rain | Controller app or IFTTT | Protects lights, saves battery |
| Test and Adjust | Run a manual cycle, tweak settings | All apps | Ensure lights sync with irrigation |
Avoiding Common Pitfalls
To ensure your solar lighting and irrigation linkage works smoothly, watch out for these beginner mistakes:
-6-1024x400.webp)
- Different WiFi Networks: Ensure both your solar lights and irrigation controller are on the same 2.4 GHz WiFi network. Mixing networks (e.g., 5 GHz for lights, 2.4 GHz for irrigation) can cause connection failures.
- Weak WiFi Signal: If your yard has poor WiFi coverage, lights or controllers may not respond reliably. Use a WiFi extender or mesh network to boost the signal.
- Ignoring Weather Protection: Solar lights are water-resistant, not waterproof. Without a rain delay rule, they may turn on during heavy rain, risking damage. Always enable weather-based adjustments.
- Overly Bright Lights: Setting lights to 100% brightness during irrigation can drain batteries faster. Stick to 70% for sufficient visibility and energy savings.
- Skipping Tests: Always test the linkage after setup. Run a short irrigation cycle to confirm lights turn on/off at the right times and adjust as needed.
Real-World Benefits: Stories of Convenience
Imagine Sarah, a busy mom in Phoenix who loves her desert garden but often forgets to turn off her patio lights after late-night watering. With a Rain Bird ARC8 controller and WiFi solar lights linked via IFTTT, her lights now turn on automatically at 70% brightness 5 minutes before her sprinklers start, letting her check her cacti without stepping on pipes. They turn off 10 minutes after watering, saving energy. Similarly, Tom, a retiree in Portland, used to struggle with manual light switches due to arthritis. By linking his Orbit B-hyve system with solar pathway lights, he enjoys a fully automated setup that lights his garden during irrigation, no hands required.
These stories show how light-controlled irrigation makes yard care effortless, letting you focus on enjoying your plants rather than managing switches or schedules.
Installation and Maintenance Tips
To keep your system running smoothly, follow these tips tailored for homeowners:
- Maximize Solar Exposure: Place solar lights in areas with full sun exposure to ensure batteries charge fully. Trim overhanging branches if needed.
- Clean Solar Panels: Dust or debris can reduce charging efficiency. Wipe panels monthly with a damp cloth, especially in dusty regions like the Southwest.
- Check Controller Settings: Review your irrigation app monthly to ensure schedules and linkage rules are up to date, especially as seasons change.
- Winter Storage: In colder climates like Minnesota, store solar lights indoors during winter to protect batteries from freezing.
- Update Apps: Keep your lighting and irrigation apps updated to avoid compatibility issues with new WiFi or smart home features.
Conclusion: Effortless, Eco-Friendly Yard Care
Linking solar lights with your smart irrigation system transforms your yard into a smart, energy-efficient oasis. With solar lighting and irrigation linkage, you’ll never stumble in the dark to check a water pipe or waste energy leaving lights on after watering. By using WiFi-enabled devices like Rain Bird or Orbit controllers and apps like Irrigation Caddy, you can create a light-controlled irrigation setup that’s easy to manage, even if you’re new to smart home tech. This system saves time, conserves energy, and ensures your garden thrives—all without lifting a finger. For more smart home gardening tips or to explore compatible devices, check out retailers like Home Depot or Amazon, or visit Rain Bird and Orbit’s websites for product details. Your yard deserves to shine, effortlessly.


Leave a Reply