
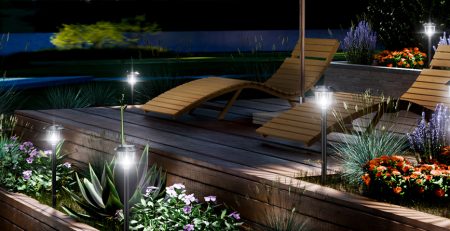
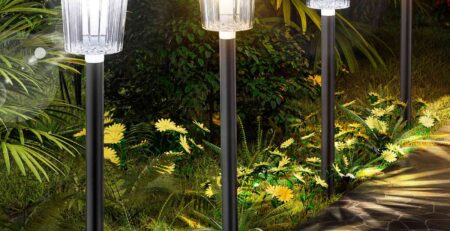
How Do I Know If My Solar Light Battery Needs Replacement?
You’ve probably been there: your solar lights, once the star of your backyard glow, start fading like a tired flashlight. It’s frustrating when those pathway markers or garden accents barely flicker past dusk. I’ve tossed a few cheap ones in the trash before realizing the issue is often the battery, not the whole light. Dimming after months of use is one of the most common problems with solar lights, and it’s usually a sign the battery’s on its last legs. The good news? You don’t need to be a tech wizard to figure out if it’s time for a swap or how to fix it. Let’s break down what to look for, how to replace the battery, and whether upgrading makes sense.

Battery Lifespan: NiMH vs. Lithium
Solar lights typically use two types of rechargeable batteries: nickel-metal hydride (NiMH) or lithium-ion. Each has its own lifespan, and knowing which one powers your lights helps you gauge when it’s time for a change.
Here’s the rundown:
- NiMH Batteries: Common in budget solar lights, these last about 1-2 years or 500-1000 charge cycles. They’re affordable but lose capacity faster, especially in cold weather.
- Lithium-Ion Batteries: Found in pricier models like Bitpott or Ring, these stretch to 2-3 years or 1000-2000 cycles. They hold charge better in extreme temps.
- Real-World Context: A Reddit thread mentioned NiMH batteries in cheap lights dying after one harsh winter, while lithium-ion ones in premium sets kept going for two.
If your lights are a couple of years old and dimming, the battery’s age is likely the culprit. Check the specs (usually on the box or manual) to see what type you’ve got and plan accordingly.
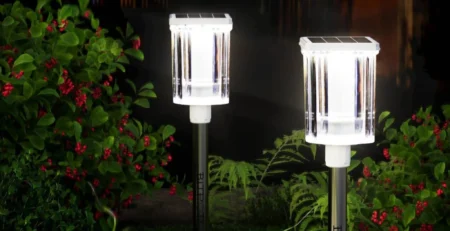
Signs Your Battery’s Toast
When solar lights start acting up, it’s tempting to assume the whole unit’s shot. But a failing battery usually leaves clear clues. Spotting these early can save you from buying new lights unnecessarily.
Key signs to watch for:
- Dim Light: If the brightness is barely a glow, even after a sunny day, the battery’s not holding enough charge.
- Shorter Runtime: Lights that once lasted till midnight but now fizzle out by 9 p.m. point to reduced battery capacity.
- No Charging: If the light stays off despite full sun exposure, the battery might not be taking a charge at all. Test by cleaning the solar panel first—dust can block charging.
- Physical Damage: Swollen, corroded, or leaking batteries (visible when you open the compartment) are a dead giveaway.
I saw an X post where someone described their solar fence lights going from “bright as the moon” to barely visible in six months. Turned out, the NiMH battery was kaput. If you’re seeing these signs, it’s time to consider a replacement.

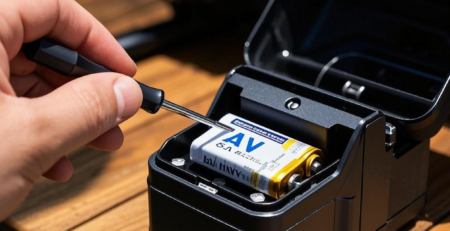
Replacing the Battery: A Simple Fix
Swapping out a solar light battery isn’t rocket science, but you want to do it right to avoid damaging the light or wasting money on the wrong part. Most solar lights make it easy, with accessible compartments and standard battery sizes.
Step-by-step guide for safe replacement:
- Check the Battery Type: Look at the old battery (e.g., AA NiMH 1.2V 600mAh or 3.7V lithium-ion). Match the voltage and size exactly—mismatching can fry the light.
- Open the Compartment: Use a small screwdriver to access the battery slot, usually under a waterproof cap. Be gentle to avoid cracking the casing.
- Swap and Secure: Pop in the new battery, ensuring correct polarity (+/-). Seal the compartment tightly to maintain water resistance (IP65 models need this).
- Test and Charge: Place the light in direct sun for a full day, then check if it’s back to full brightness.
I replaced the batteries in my old garden lights last summer, and it took 10 minutes tops. Amazon reviews often mention how brands like Sunforce include clear instructions, making it a breeze. Just double-check the battery specs to avoid headaches.
Upgrading Batteries: Worth the Boost?
If you’re replacing batteries anyway, you might wonder if upgrading to a higher-capacity one will juice up your solar lights’ performance. The answer? Sometimes, but it’s not a free-for-all. Higher-capacity batteries (measured in mAh) can store more charge, potentially extending runtime or brightness, but there are limits.
What to consider before upgrading:
- Compatibility: Your light’s circuitry must handle the extra capacity. A 600mAh NiMH can often swap for an 800mAh, but going too high (e.g., 2000mAh) might overload cheap models.
- Runtime Gains: A Medium post noted a 20% longer runtime (10 hours vs. 8) after upgrading to a 1000mAh lithium-ion in a compatible light.
- Cost vs. Benefit: Higher-capacity batteries cost more—$5 vs. $2 per unit. If your lights are low-end, replacing the whole set might be smarter.
- Quality Matters: Stick to reputable brands like Panasonic or Anker for replacements. Cheap no-name batteries often underdeliver, per forum gripes.
One gardener I know upgraded their solar path lights’ batteries and got an extra hour of glow nightly, but they warned against pushing too far beyond the original specs. Check your light’s manual or online specs before splurging.
Fix the Battery, Fix the Light
Dim or dead solar lights don’t always mean a trip to the store for new ones. Most issues boil down to worn-out batteries, whether NiMH (1-2 years) or lithium-ion (2-3 years). Look for telltale signs like dimming, short runtime, or no charging at all, and you’ll know it’s time to swap. Replacing the battery is a quick fix—10 minutes with a screwdriver and the right replacement. Upgrading to higher-capacity batteries can boost performance, but only if your light can handle it. Spend a few bucks on a new battery, and your solar lights can shine bright again, saving you from tossing out perfectly good units. It’s a small tweak that keeps your yard glowing and your wallet happy.
-6-3-450x231.webp)


Leave a Reply